How to Camp in the Winter - Gear, Tips, & Safety for Winter Camping
Winter Camping

Deciding to go camping in the winter may not sound like the craziest thing. Camping in the winter has its perks. During the winter, there are less bugs, crowds, and bears(since most of them are hibernating). You are also welcomed by the white and frosty scenery that you only get during winter camping. The biggest reservation for people not camping in the winter is the dangers and discomfort of the cold; however, with some careful planning and preparation, you can make this daring season one of the best times to go camping.
Layering up in the winter: Hats, gloves, baselayers, puffys, and hardshell jacket and pants are essential for a comfortable winter camp.
What gear to bring: You’ll want to bring a 4-season tent, warm sleeping bag, insulated sleeping pad, closed cell-foam pad, and stove that is suitable for cold temperatures.
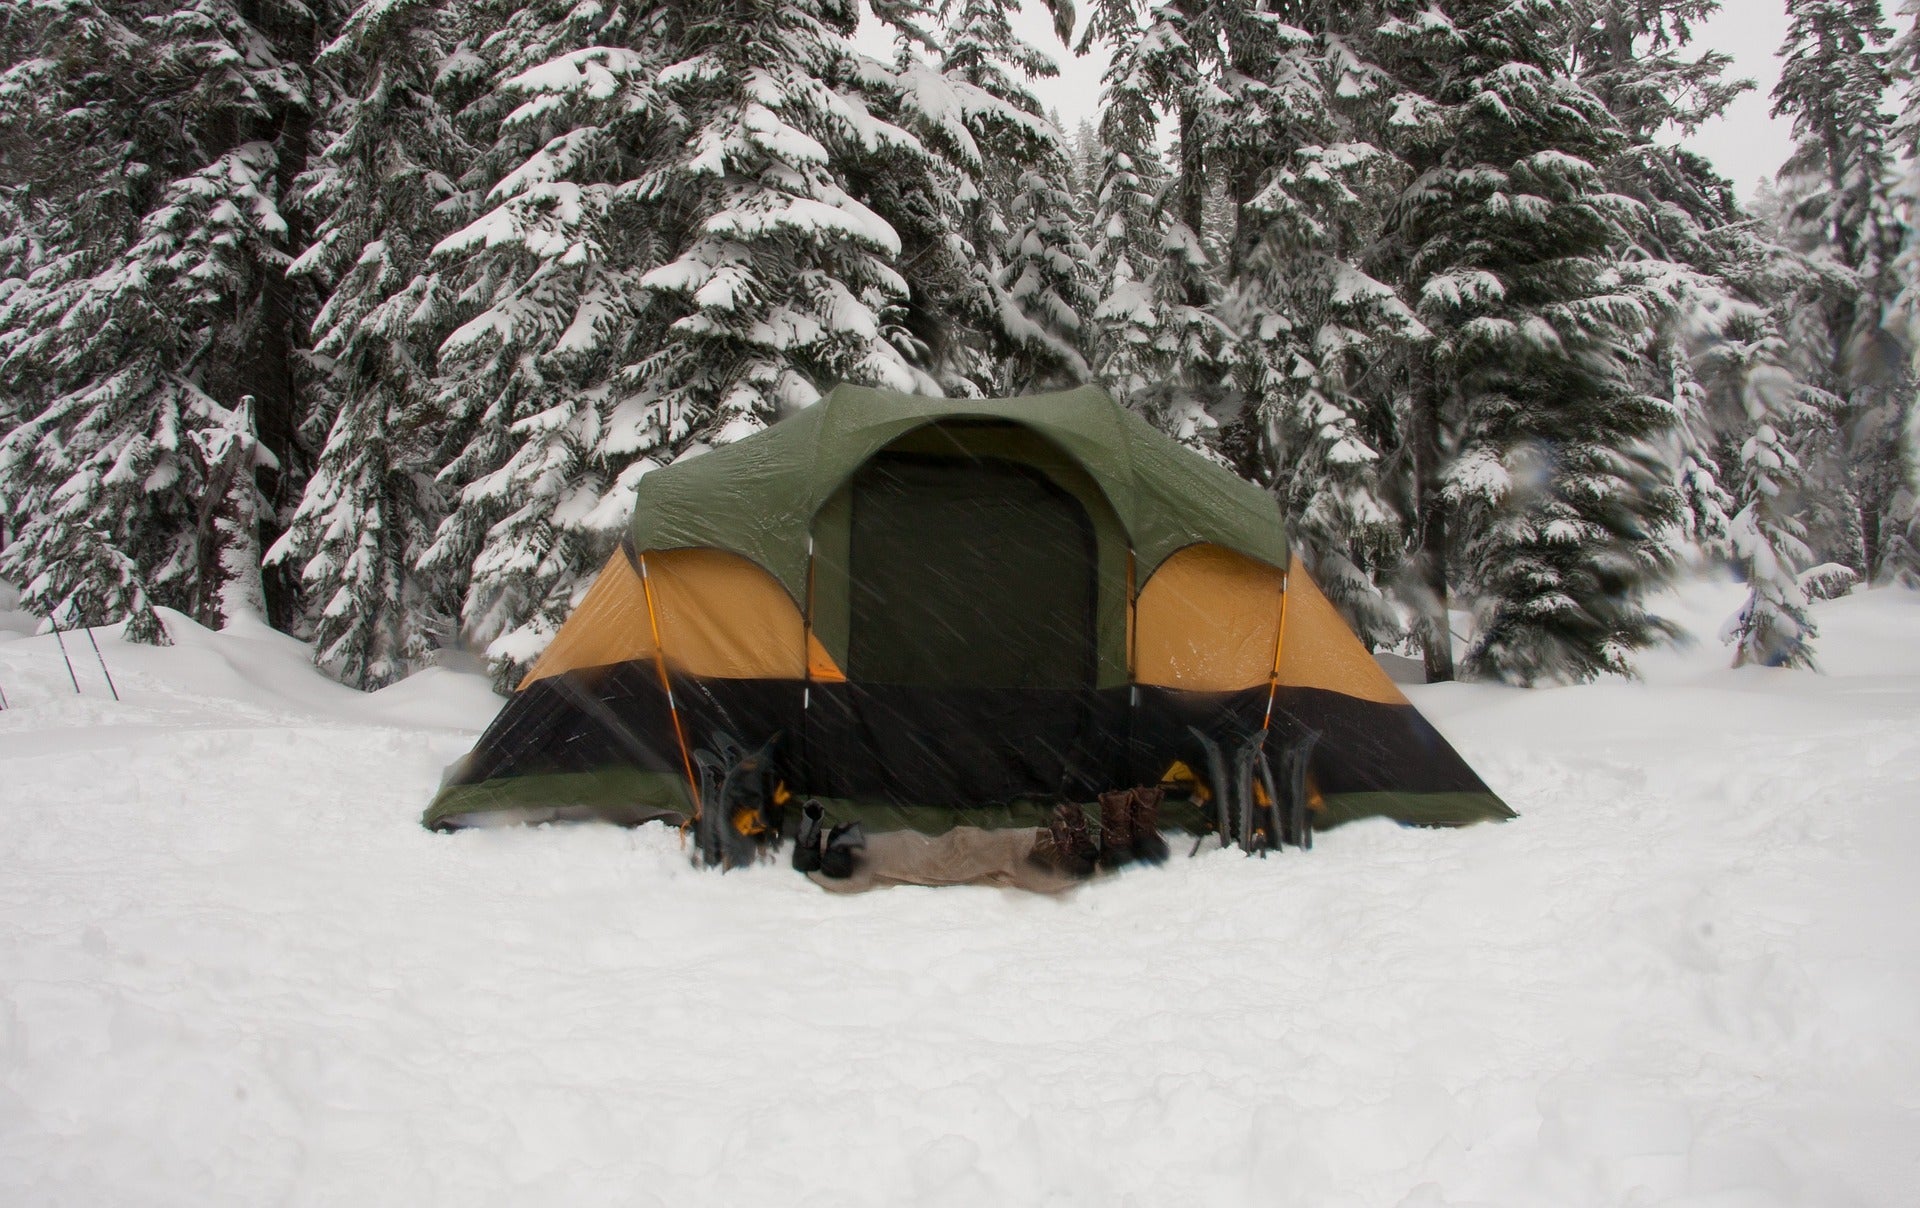
Tips on how to set up camp: Find a spot that is sheltered from wind and avalanches and pack the snow on the ground so that it is dense enough to lay your ground cloth.
How to stay warm at night: Get a light exercise going to increase your heart rate before jumping into your sleeping bag. Your body generates heat when digesting, so prepare to eat plenty.
Snow hazards: Prevent frost bite, hypothermia, and dehydration from occurring. Stay far away from avalanche territory.
Layering up in the Winter

The key to staying warm and comfortable in the winter is having the appropriate set of clothes. The golden rule is that you should dress warm enough so that you won’t sweat. If you plan on doing any high-output exercises like hiking, snowboarding/skiing, or building out your campsite, your body is likely to generate some heat.
Base layer(underwear): This will be the layer that touches your skin and will be the thinnest. Your base layer should always cover your entire body(upper and lower) and provide moisture wicking qualities in case of sweat or condensation. Synthetics like polyester are superior at getting moister out and drying quickly.
Mid layer: This layer is the part that should retain your body’s warmth and consist of insulating materials. Your upper body should have a vest or jacket that is made of down; however, some may prefer fleece.
Outer layer: Your outer layer will be your shell and consist of waterproof capabilities to shield you from rain, sleet, snow, and wind. Most outer layers will be for your upper body and pants. Be sure to find something that is breathable, wind-resistant, and fully waterproof.
Hats: Beanies, facemasks, and balaclavas work well in keeping your face and ears covered from the cold.
Gloves: When camping in places where there will be a lot of snow, opt for waterproof and breathable gloves. If you’re traveling to a place where there is not so much snow, fleece gloves should work fine.
Glasses or goggles: There will be a lot of light reflecting off the snow. It is important to protect your eyes with dark lenses with visible light transmission (VLT). We suggest 0-19% if it is sunny or 20-40% if it is cloudy.
Footwear: Depending on your trail and the amount of snow, you will have to choose between regular hiking boots or mountaineering boots that are waterproof and insulated. Gaiters can help keep snow from seeping into your boots and provide warmth.
What gear to bring

Sleeping bag: You’ll have a choice between down or synthetic. Down insulation weighs less, compresses smaller, last longer, and costs more while synthetic performs better when wet, dries faster, and costs less. When choosing either option, pick a sleeping bag that has a water-resistant outer membrane since there will be a lot of moisture during winter camping.
Consider choosing a bag with an EN temperature rating 10°F(-12°C) lower than the anticipated temperature of your campsite, you can always vent out the bag if it gets too hot inside. If the temperature of your destination will be lower than your bag rating, you can bring a sleeping bag liner to boost warmth and increase the longevity of your bag.
Hooded sleeping bags perform better in the winter and allow you to cinch the top to cover your face.
Sleeping Pad: Self-inflating sleeping pads are often the preferred choice when camping when compared to foam due to its higher evaluation from the ground; however, we recommend bringing both a closed cell foam and self-inflating sleeping pad during winter camping. Having a closed cell foam pad will protect yourself inflating pad from moisture and offer greater separation from the ground. Pads that are insulated can also provide an extra layer of warmth by trapping cold air.
When looking for a self-inflating sleeping pad, pick one with an R-Value of greater than 3.0. Some brands may even include temperature ranges to simplify your choosing.
Tent: Ideally, you’d want to bring a four-season tent to sleep in; however, if you’re not expecting heavy snow or strong winds, three-season tents can also be an option. Whichever tent you go for, choose one that will provide extra storage space for gear that you wouldn’t want to leave out in the cold.
Kitchen Tent: Eating a meal can be a whole another experience in the winter. If you plan to stay at a camp site for an extended period of time(1-2 days) you can get crafty and use a tarp shelter over the snow and dig out a comfortable dining area with a table and some benches.

Stove: Allocate about eight ounces of fuel per person, per day as you will need extra to melt snow for drinking water. Most liquid fuel and canister stoves work well in the winter; however, there are some trade-offs in between. Liquid fuel stoves perform better in colder conditions than canister stoves but is heavier and slower to boil. Canister stoves are lighter but tend to depressurize in the cold. If you choose to bring a canister stove, keeping your canister in your sleeping bag at night or in a jacket during the day may help prime the stove for cooking. A pressure regulator is also an option but it may void the warranty on your stove.
Shovel: A shovel is essential to setting up your campsite, digging for a snow shelter, or getting fresh snow for water.

Footwear: If the trails are slicks and frozen, consider crampons as an addition to your boots. In areas where you’ll be trekking across lots of snow, you may need floatation devices like snowshoes or skis to get around.
Tips on how to set up camp
Although it is possible to build a shelter out of snow(ie. igloo), it may not be practical. For most, camping will be done inside a tent.
Before setting up, find a location that isn’t angled or on a slope. Pack the snow on the ground making sure it is leveled out before layering over your tent. Loose snow is prone to melt more easily from body heat and will cause your sleep to be uncomfortable.
Build a wall around your tent if you are experiencing high winds and dig under your vestibule to create more storage space for your gear.
Staking out your tent properly can protect it from heavy winds. Regular stakes will not perform well in the snow, you can either substitute the stakes with snow stakes or use stuff sacks filled with snow to hunker down your tent.
How to stay warm at night
Having a warm bag, layers, and pad may not always guarantee that you’ll be warm. Here are some tips that can help you stay warm in your sleep.
Sleep in clean clothes: Dirt, oil, and sweat may cause the insulation in your bag to weaken.
Eat food for warmth: Your body generates heat when digesting food, so keep snacks within your reach.
Light exercise: Before jumping right into your bag, do a light workout. Jumping jacks, running in place, or anything that will bring your heart rate up.
Boil water into a bottle: Use a hard-plastic water bottle to contain the boiling water and throw it into your sleeping bag to warm your bag up. Once the water comes to a warm temperature, hold onto it next to your femoral artery to keep your body warm.
Pee: By emptying your bladder, your body will use less energy holding onto that liquid and will perform better at maintaining your temperature.
Down booties: Pair your socks with some down booties for extra warmth when sleeping.
Snow hazards

Chances of hypothermia and frostbite increase significantly in the winter, so it’s best to stay educated and notice early signs within your group.
Hypothermia occurs when your body loses heat faster than it can produce heat, causing a dangerously low body temperature. Hypothermia occurs when body temperature falls below 95°F (35°C).
Signs of Hypothermia include
-Shivering
-Clumsiness (ie. trouble operating a zipper, stumbling, falling)
-Change in mental status (ie. slow thinking, confusion, forgetfulness)
-Undetectable pulse
Frostbite is the freezing of the skin and tissues. Skin becomes very cold and red, numb, then hard and pale and commonly occurs around the fingers, toes, nose, ears, cheeks, and chin.
Signs of frostbite:
-Pale and waxy skin
-Numbness or pain in the affected area
-Hard skin
-Blisters after thawing
Avalanches

Avoid avalanche territory as much as possible by studying the area around you. Here are signs to look out for:
Change in weather: A dramatic change in weather creates different layers of snow, increasing the changes of an avalanche. Sudden rain can leave a layer of ice and melted snow that can weaken slopes causing snow to tumble. The same goes for snowy to sunny and vice versa.
Ice crystals on top of snow: Hoarfrost, sugary-looking crystals on top of snow, can be a warning sign that there is snow on top of a frozen layer.
Cracks: Cracks that form in the snow from your feet or skis can be a sign of layer failure.
Strong wind: Strong winds that have blown for long periods can create dangerous slabs. Wind slabs are usually found in higher elevations on the leeward or sheltered side of ridges, peaks, and passes.
Recent avalanches: Scan the area, if you spot any evidence of recent slides that means the snow maybe unstable. Know the type of avalanches by examining the freshness of debris.
Types of Avalanches

(photo credits: Safeback)
Slab: Slab avalanches are the most dangerous type of avalanche. Slabs are fractured blocks of ice that slide down when a surface layer fails. They are normally triggered by victims, winter hazards, or gravity.

(photo credits: Colorado Avalanche Information Center)
Wet/loose snow slide: Wet snow slides are normally caused by melted snow from sun or rain and take form of a triangular-shaped path.
If you will be traveling near avalanche territory it is important to know how to use and bring an avalanche transceiver and probe.


Leave a comment
All comments are moderated before being published.